
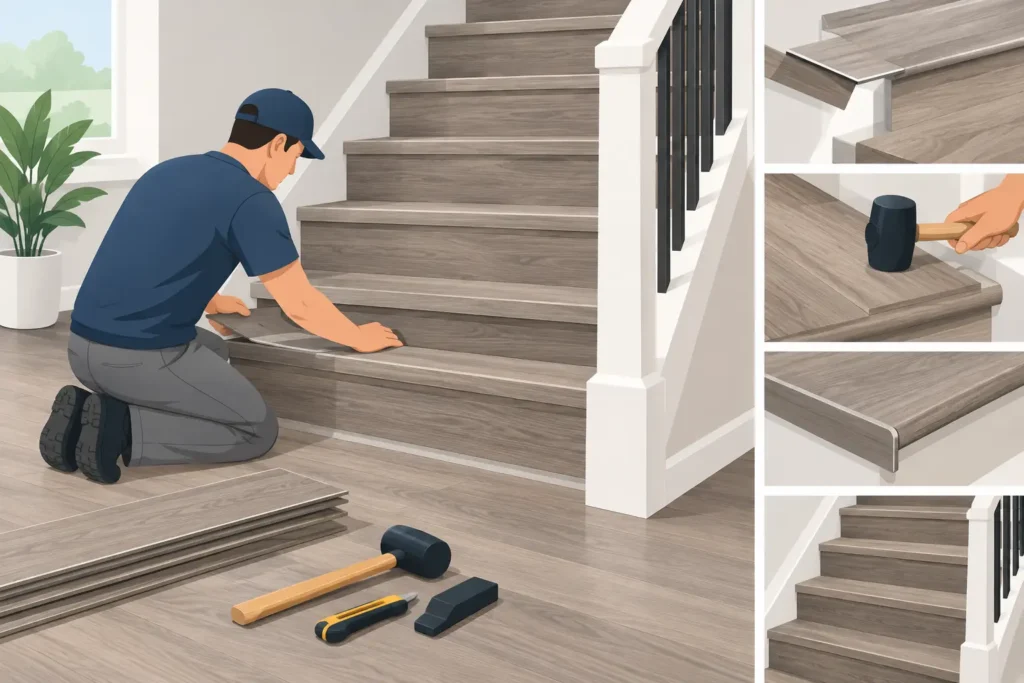
Stairs are where a vinyl flooring project either looks professionally finished or immediately shows its weak points. To install vinyl plank stairs correctly, the planks must be firmly bonded, the edges must be protected with compatible stair nosing, and every tread needs a clean, consistent fit. Unlike a flat floor, stairs receive concentrated foot traffic on their front edges every day.
For homeowners, property managers, and business owners, vinyl plank can be an attractive option for stairways because it delivers the look of wood with easier maintenance and strong water resistance. But it is not a job to treat like a standard floating-floor installation. A careful plan protects the appearance, safety, and long-term value of the staircase.
Can Vinyl Plank Be Installed on Stairs?
Yes, most luxury vinyl plank products can be installed on stairs, provided the manufacturer approves that application and offers a compatible stair-nosing profile. The installation method is usually different from the one used across an open room. Vinyl planks on stairs are typically cut to size and adhered directly to each tread and riser rather than clicked together as a floating floor.
This distinction matters. A floating floor needs room to expand and contract, while a stair tread needs a secure surface that will not shift, flex, or separate under foot traffic. Using an adhesive intended for the product and substrate creates the stable bond stairs require.
Not every vinyl plank is the right choice. Thin, flexible material can telegraph imperfections in old stair treads, while some click-lock profiles are difficult to adapt around the front edge of a step. Before buying material, confirm the product’s stair-installation requirements, recommended adhesive, and matching trim options.
Start With the Stair Structure, Not the Planks
The best-looking installation begins with a sound staircase. Remove existing carpet, pads, tack strips, staples, and loose trim. Carpet staples are easy to overlook, but even a few remaining fasteners can create bumps beneath vinyl or interfere with a clean fit.
Inspect every tread and riser for movement, cracks, water damage, protruding nails, or uneven surfaces. Squeaks should be addressed before flooring goes down. Once vinyl planks are bonded to the steps, accessing the subfloor becomes more difficult and can damage the new finish.
Wood stair treads must be clean, dry, and structurally solid. Fill minor holes and low spots with an appropriate patching material, then sand down high points. If the stairs have old paint, adhesive residue, or a glossy coating, surface preparation becomes even more important. Adhesive needs a clean, stable surface to bond properly.
In older Los Angeles homes and commercial properties, stair dimensions can vary more than expected. Measure each tread individually instead of assuming every step has the same width or depth. Small differences become very noticeable when plank seams and nosing lines do not align.
Check tread depth and riser height
Adding vinyl plank, adhesive, and stair nosing can slightly change the finished dimensions of a step. That may not seem significant, but inconsistent tread depth or riser height can create a tripping concern. It can also affect whether the stairway remains compliant with applicable building requirements.
This is one reason stair projects deserve a professional assessment, especially when an existing stairway is already narrow, uneven, or showing signs of structural wear. The goal is not simply to cover the stairs. The goal is to preserve a safe, even walking surface.
Choose the Right Stair Nosing
Stair nosing is the protective profile fitted at the front edge of the tread. It covers the vulnerable leading edge, provides a finished transition, and helps the step resist the wear caused by shoes, rolling carts, pets, and daily traffic.
A matching nosing designed for the exact vinyl plank line generally produces the best result. It is made to coordinate with the plank thickness, color, and wear layer. Generic metal or wood trim may be necessary for certain designs, but it can look less integrated and may require a different installation approach.
There are several nosing styles, including overlap profiles that sit over the plank edge and flush profiles that create a more streamlined appearance. A flush look is popular in modern homes and offices, but it demands accurate cuts and a very even substrate. Overlap nosing can be more forgiving, yet it creates a slightly more visible edge.
Do not skip this component to save money. Without properly installed stair nosing, the plank edge is more exposed to chipping, lifting, and moisture intrusion. It is also harder to achieve the crisp, finished look most property owners expect.
How to Install Vinyl Plank Stairs Step by Step
The exact sequence depends on the flooring brand and nosing system, but professional installation follows a disciplined process.
First, acclimate the vinyl planks according to the manufacturer’s instructions. Indoor temperature and humidity should be reasonably stable before and during the work. Vinyl is more dimensionally stable than many natural materials, but installation conditions still affect its performance.
Next, dry-fit each tread piece. Measure from side to side and from the riser to the nosing location, then transfer those measurements to the plank. A sharp utility knife may work for straight cuts on some vinyl products, while a saw can deliver more precise results for thicker rigid-core planks or detailed trim cuts.
Plan seams carefully. A single full-width plank on each tread often creates the cleanest appearance when the stair width allows it. On wider stairs, seams should be staggered thoughtfully and kept away from the most exposed front edge when possible. Random, narrow end pieces can make a staircase look patched together.
Apply the specified adhesive to the prepared tread using the trowel size recommended by the adhesive manufacturer. Adhesive coverage matters. Too little can leave hollow areas or loose corners, while too much can squeeze through seams and create cleanup problems. Set the plank into place within the adhesive’s working time, press it firmly, and use a roller where practical to improve contact.
Install the stair nosing according to its product instructions. Some profiles adhere directly to the tread, while others include a track or mechanical fastening system. Keep the nosing straight across the entire step. A crooked front edge becomes obvious the moment someone looks up the staircase.
Risers are often installed after the tread and nosing, although the correct order depends on the trim design. Vinyl on risers can create a fully coordinated, wood-look staircase. In other projects, painted risers provide a clean contrast and reduce material costs. Either approach can work well when the proportions and finish are intentional.
Finish each step before moving on
Take time to inspect each tread as it is completed. Check that the plank is fully seated, joints are tight, and the nosing is secure. Wipe away excess adhesive promptly using a cleaner approved for the material. Once adhesive cures, removing residue without dulling or damaging the vinyl can be difficult.
Avoid heavy use until the adhesive reaches its stated cure time. A staircase is tempting to use immediately, so plan alternate access if possible. Premature traffic can shift planks before the bond fully develops.
Common Mistakes That Shorten the Life of Vinyl Stairs
The most common mistake is treating stair installation like a floating-floor project. Click-lock planks that are not properly bonded can move at the edges and fail under repeated pressure. Another frequent issue is installing over uneven or damaged stair treads without correcting the surface first.
Poorly planned seams, mismatched nosing, and rushed measurements also hurt the final result. Vinyl plank is forgiving in many rooms, but stair edges are highly visible. A gap near a wall, an uneven riser, or a nose that does not sit flush can make an otherwise attractive material look unfinished.
Moisture is another concern. Vinyl itself resists water, but water can still reach the wood beneath it through unsealed edges or damaged trim. Address leaks, wet entry conditions, and pet-related moisture issues before installation. For exterior-facing stairways or areas exposed directly to weather, standard interior vinyl plank is usually not the right material.
When Professional Installation Is the Better Value
Installing vinyl plank on a short, straight staircase can be manageable for an experienced DIYer with the right tools and patience. Complex stairways are different. Curved steps, landings, open-sided stairs, uneven framing, and custom transitions require more detailed layout and finish work.
Professional installation also helps when time matters. Property managers may need a vacant unit turned quickly, while homeowners may not want a main staircase out of service for several days of trial-and-error work. An experienced flooring team can identify subfloor issues, select compatible materials, and keep the project moving without costly rework.
Magnet Flooring helps clients evaluate whether vinyl plank is the right fit for their stairs, budget, and daily use. A proper on-site measurement can clarify the material quantity, trim needs, surface repairs, and installation approach before work begins.
A well-finished vinyl staircase should feel solid underfoot, look intentional from every angle, and stand up to daily life without constant touch-ups. If your stairs need more than a simple cover-up, start with a professional assessment and build the finish around the condition of the structure.